Re: Vulcan-74 - A 6502 Powered Retro MegaProject
Posted: Fri Oct 09, 2020 7:03 pm
Thanks, this great info will be added to my options list when the time comes to decide on a design.
I do have a small 24" CNC machine here, so adding a dremel to drill might just work.
When I did my dic calcs, I used 32 DPI as a max, but with 80 DPI as you have shown, it will work.
Brad
I do have a small 24" CNC machine here, so adding a dremel to drill might just work.
When I did my dic calcs, I used 32 DPI as a max, but with 80 DPI as you have shown, it will work.
Brad
GARTHWILSON wrote:
Well, if you change your mind and decide to try it, according to my back-of-the-envelope rough calculations,
I use the gerbv free gerber viewer to check my work before sending the files to PCB manufacturers. I know how to do the basics but I don't know if it can edit. In any case, you'll need to write a program to produce the original files. It should not be too hard.
The aperture list comes first in a gerber 274X file, before the actual gerber data. It will look something like:
The lines with "C" are for round (circular) apertures, and the ones with "R" are rectangular, which I show as square, with the same length as width here. G04 means a comment line; so if you edit by hand, you can leave records of what you did. The photoplotters are ditital now, like laser printers instead of pen plotters, so they can make the apertures anything you want. Cheap board houses used to require that you select the hole sizes from their list so they could keep only 16 drill sizes mounted, since that's hardware and can't be changed as easily.
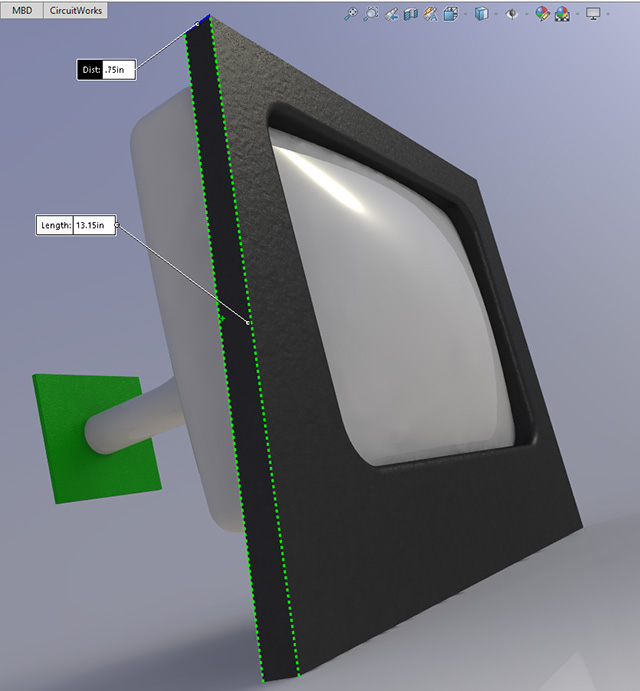
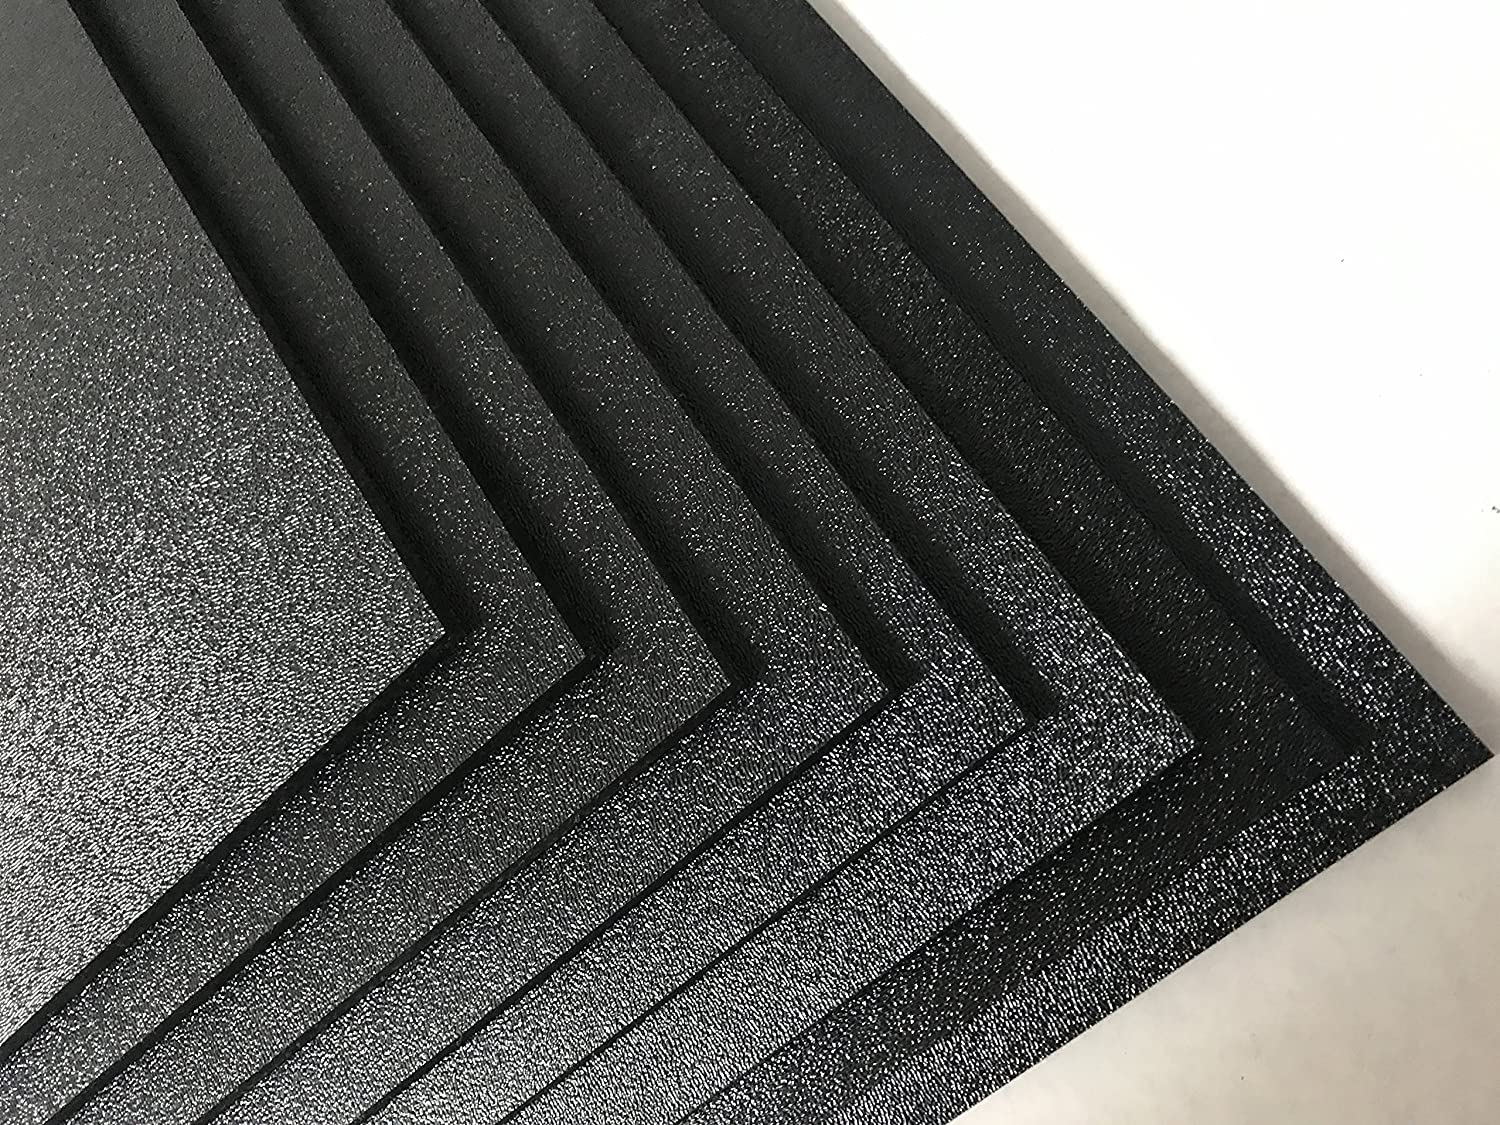
You might find something in an arts & crafts store with the desired CRT bezel surface that could serve as a mold. It would have to be applied in pieces, so you'll have to get creative as to how to hide the seams. It's amazing what a big place like Michael's has. I like to go and just browse. It gives me all kinds of ideas of how I could do something.
- With the outer ring being 11.5" diameter (for a 12" disc) and the inner ring being 4.5" diameter, and .006" trace & space, you get about 280 rings.
- With the same trace/space size, you get 83 separated dots per inch. If that means 83 bits rather than 166, that's 2.9Kb per ring on the outside ring and 1.2Kb at the inside.
- If the average were about 2Kb per ring, that makes for about 560Kb for the whole thing. 2Kb/ring is really the median though, not the average, and I think that correctly calculated, the average would be higher. Regardless, you should definitely get more than 64K bytes per side.
ttlworks wrote:
I'm not familiar with the RS-274X extended Gerber format.
But there are Gerber viewers out there, and in some of them it might be possible to edit the Gerber file.
But there are Gerber viewers out there, and in some of them it might be possible to edit the Gerber file.
I use the gerbv free gerber viewer to check my work before sending the files to PCB manufacturers. I know how to do the basics but I don't know if it can edit. In any case, you'll need to write a program to produce the original files. It should not be too hard.
Quote:
Just make sure that your aperture list matches the aperture list of the PCB manufacturer.
Code: Select all
%FSLAX23Y23*%
G04 Define apertures *
%ADD10C,0.003*%
%ADD11C,0.006*%
%ADD12C,0.007*%
%ADD13C,0.008*%
%ADD14C,0.010*%
<...snip...>
%ADD43R,0.054X0.054*%
%ADD44R,0.060X0.060*%
%ADD45R,0.064X0.064*%
%ADD46R,0.070X0.070*%
%ADD47R,0.074X0.074*%
G04  End aperture list *
G04  Begin Gerber data *
X0Y0D02*
D02*
D11*
X1594Y741D02*
<...snip...>
The lines with "C" are for round (circular) apertures, and the ones with "R" are rectangular, which I show as square, with the same length as width here. G04 means a comment line; so if you edit by hand, you can leave records of what you did. The photoplotters are ditital now, like laser printers instead of pen plotters, so they can make the apertures anything you want. Cheap board houses used to require that you select the hole sizes from their list so they could keep only 16 drill sizes mounted, since that's hardware and can't be changed as easily.
You might find something in an arts & crafts store with the desired CRT bezel surface that could serve as a mold. It would have to be applied in pieces, so you'll have to get creative as to how to hide the seams. It's amazing what a big place like Michael's has. I like to go and just browse. It gives me all kinds of ideas of how I could do something.