6502.org Forum  Projects  Code  Documents  Tools  Forum
It is currently Sat Apr 20, 2024 11:37 am

All times are UTC


Post new topic Reply to topic  [ 733 posts ]  Go to page Previous  1 ... 8, 9, 10, 11, 12, 13, 14 ... 49  Next
Author Message
PostPosted: Tue Sep 22, 2015 10:21 pm 
Offline
User avatar

Joined: Fri Aug 30, 2002 1:09 am
Posts: 8425
Location: Southern California
ElEctric_EyE wrote:
Oneironaut wrote:
...
...Any doubters lingering out there that say a breadboard with 240 ICs can't run properly at 20 / 30 MHz!??

Cheers,
Radical Brad

What are you using for a power supply source? How would you describe your power distribution scheme? Bypass cap's on every IC?

You use all HC TTL so that's pretty safe... No doubts here. A most impressive breadboard design!

Looking forward to your audio section Brad.

EDIT: You have to chime in on the "Techniques for high speed digital circuits" 'sticky'

I'm still waiting for the 6502. Running a 6502 at a given number of MHz is not the same thing as running a 74HC shift register or a flip-flop at the same number of MHz, as the 6502's timings are much more critical.

_________________
http://WilsonMinesCo.com/ lots of 6502 resources
The "second front page" is http://wilsonminesco.com/links.html .
What's an additional VIA among friends, anyhow?


Top
 Profile  
Reply with quote  
PostPosted: Tue Sep 22, 2015 11:44 pm 
Offline
User avatar

Joined: Mon May 25, 2015 2:25 pm
Posts: 632
Location: Gillies, Ontario, Canada
Hey thanks!

My power supply is a single 2amp 5volt wall wart stolen from an Linksys router.
I have no bypass caps on any IC except for the SRAMs, just a few odd ones on the breadboard rails.

Brad

ElEctric_EyE wrote:
Oneironaut wrote:
...
...Any doubters lingering out there that say a breadboard with 240 ICs can't run properly at 20 / 30 MHz!??

Cheers,
Radical Brad

What are you using for a power supply source? How would you describe your power distribution scheme? Bypass cap's on every IC?

You use all HC TTL so that's pretty safe... No doubts here. A most impressive breadboard design!

Looking forward to your audio section Brad.

EDIT: You have to chime in on the "Techniques for high speed digital circuits" 'sticky'


Top
 Profile  
Reply with quote  
PostPosted: Tue Sep 22, 2015 11:47 pm 
Offline
User avatar

Joined: Mon May 25, 2015 2:25 pm
Posts: 632
Location: Gillies, Ontario, Canada
I promise the wait won't be much longer, and I will not disappoint!

On another small board, I have a 6502 connected to one of my SRAMs, and it is playing a sound sample over and over, running at 25MHz.
From what I have tried so far, the 6502 will be a breeze to run at 20MHz compared to the design of the Video Generator section of this project.
Like all things I do, my 6502 decoding and IO scheme will not be like anything seen before... I have ideas... evil, crazy ideas!!

A side note on my soon to begin 6502 journey...

I am a total 6502 newb. That other board I mentioned is my first ever attempt at using a 6502, and although the assembly seems simple thanks to my AVR background, I fully expect there to be an intense yet fun learning curve to what I am going to achieve.
I am not using Vias or any of the usual 6502 IO tricks, but plan to do something way out of the box. Who knows... I may even come up with something new since I don't know the "rules"!

Being an eccentric freak, I would also ask that no matter what the 6502 experts see me do that no advice be given unless I specifically ask.
I understand and respect the vast wealth of knowledge here, but prefer to learn the hard way, even if it means starting over 20 times.
So please... just enjoy the ride, and do not suggest a detour if I am about to fall of a cliff.

I do enjoy the the finish line, but I like race to be grueling and painful!

Thanks,
Radical (and stubborn) Brad


GARTHWILSON wrote:
ElEctric_EyE wrote:
Oneironaut wrote:
...
I'm still waiting for the 6502. Running a 6502 at a given number of MHz is not the same thing as running a 74HC shift register or a flip-flop at the same number of MHz, as the 6502's timings are much more critical.


Top
 Profile  
Reply with quote  
PostPosted: Fri Sep 25, 2015 1:34 am 
Offline
User avatar

Joined: Mon May 25, 2015 2:25 pm
Posts: 632
Location: Gillies, Ontario, Canada
I have been cleaning up the wiring in my 15 minute spans of free time, and the board is starting to look good again.
The 44 remaining long wires are the IO lines, each of which basically toggle a bit to register some data.
The IO lines will soon be multiplexed to work with the 6502 using an untested scheme I came up with.

The next step will be to add the multiplexer into the last bit of free board space and then run a final test with the AVR.
Once the multiplexer is proven to work, I plan to swap in the 6502, using an AVR to boot load it's SRAM as I debug.
The other 24 breadboards are on order, and this will double the size of this board so I can start on the Sound System.

The board as of tonight, after cleaning up the last few control lines...

Image

Here is a huge image of the board in 4000x2000 resolution...

http://lucidscience.com/temp/vt93l.jpg

I am looking forward to getting the 6502 installed into Vulcan-74!
The 65C02 is now on a smaller board, running at 28.626MHz, doing a full IO and SRAM test.

The high speed 6502 test works like this...

- AVR holds 6502 in reset as it fills the 10ns SRAM with 6502 code.
- AVR then vanishes off the bus and takes the 6502 out of reset.
- 6502 (running at 28.626MHz), begins executing from the SRAM.
- 6502 code is an audio sample player that loops a 60K sample to a DAC.
- The test is verified by listening to The Terminator speak "I'll be back!".

At 30MHz, the 6502 begins to glitch if you add capacitance and cross-talk to the board using my extremely technical testing method... "place hand over board and jiggle wires to see what happens". Done properly, I can believe that a 6502 can handle 30MHz.

At 28.626Mhz, I cannot make the program glitch no matter how much "foo" I add to the tangle of wires.
That odd frequency is one I used lot while doing AVR video code, as it is a color burst multiple.

I would probably say that 25MHz would be a safe goal using a 6502 directly connected to a 10ns SRAM, but will just drop down to 20MHz for this project as it is already provided by the Video Section. The 6502 only needs to direct the GPU, and has no part of video generation, so it's not like I need warp speed.

I now need to decide on my 6502 toolchain. Currently, I just write the assembly in one of those java simulators and then copy the output into my AVR program, which then boot-loads the SRAM. I will eventually want a nice and simple compiler that will make my workflow as efficient as possible, which will be...

- Write assembly
- Compile to a data file
- Copy data file to my "cartridge loader"
- Press the "load button"
- See results on VGA monitor!

My current test loader is an AVR system I made that just spews the compiled 6502 program to the 64K of program memory that the 6502 uses.
Later, this loader will also write game graphics and samples to the serial flash memory used as the game cartridge.

In the completed design, Vulcan-74 will have this boot-loader functionality built from the usual 7400 logic, as one of my firm goals is to have absolutely no modern parts connected to the board. The actual "cartridge", which is a single 4-16mb serial flash memory is external, so this does not break the rules.

As for supporting development of a game cartridge, I have been working on a PC program the currently has the following features...

- Conversion of standard BMP files to RRR-GGG-BB encoded data files for used by the Video Processor.
- Conversion of standard WAVE files to 8 bit mono encoded sample files for use by the Sound Processor.

This Vulcan-74 Tool will also include a "Cartridge Program" function that will pack all of the sound, data, and 6502 code into a single file and then write it to the serial flash with the help of an AVR dongle I made that receives the data from the PC USB port.

So game or demo development will go like this...

1) Make game graphics and sprites using your favorite PC image editor. Save as BMP files.
2) Make and edit game sound effects and music on your PC sound editing program. Save as WAVE files.
3) Write 6502 code in you favorite IDE. Save as HEX file.
4) Open "Vulcan-74 Editor" and select all of the files listed above.
5) Insert the cartridge into the top loading cartridge port on the Vulcan-74 box.
6) Place the connector on the AVR / USB based loading system into the "Programming Port" on Vulcan-74.
7) Press the "Program Cartridge" button on the PC, and watch your game or demo spring to life!

Once a Cartridge has been programmed, it is fully independent of any external PC program or hardware.
I will probably keep to the retro feel, and make cheesy looking decals for each cartridge case (small black box), making them look like the old VCS cartridges!

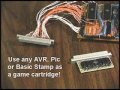
To demonstrate the "External Cartridge" concept, here is a video showing one of my very early "and crude" DIY video game systems that uses a micro controller as the game cartridge. This one is parallel, so it has a lot of wires to the port. Vulcan-74 will have only 4 wires to the cartridge port since it will be serial.
Sorry for the video quality, this was done in 2005-2006 when my camcorder was still VHS!...

Image
https://youtu.be/IyQP5MmQR7w

I have learned a few new tricks since that prototype was made, 10 years ago! Fun to look back at all the hacks, though. Note the car graphics stolen from Amiga "Test Drive"! Also notice the term "Basic Stamp"... this was what all the cool kids used before the Arduino and Raspberry Pi.

Seems I have a fetish for bouncing, spinning checkered balls.

Will post photos again when I have the IO multiplexer installed, as well as the new expanded board section.

Later...
Radical Brad


Top
 Profile  
Reply with quote  
PostPosted: Mon Sep 28, 2015 2:25 pm 
Offline
User avatar

Joined: Mon May 25, 2015 2:25 pm
Posts: 632
Location: Gillies, Ontario, Canada
Today I spent an hour optimizing the circuit.
Much like optimizing assembly, you can often use left over gates to make IO either quicker or more simplified.

For instance, I had an IO line that would disable the bus between the Sprite or Playfield memory by setting the OE line on a 74HC574. I managed to get rid of the need for an external IO line by connecting the OE through a unused inverter and then to the 74HC74 that controls the state of the GPU. So the result was hardware optimization!

I also removed all of the long IO wires, and ran them nicely along the board to a free section of breadboard I now call the "IO Port". This puts all 44 required IO lines into 2 rows of 22 on the breadboard in one single location. When I complete the multiplexing section, this will make connecting all of the IO lines much easier.

The next step is the multiplexing, which will force all IO to appear in a way that will be compatible with the 6502.
I have a plan in place, and will verify operation one last time with the AVR since it is still connected.

If all goes well, the 6502 will find a home next week.
It's still yelling out "I'll be back!" from the other board, clocked at 28.626MHz while playing the Terminator audio sample.

I am looking forward to seeing Vulcan-74 under 6502 command, and know that the 6502 part of this project will be a breeze!
Compared to what was accomplished in the Video Section, the 6502 timing and IO will probably be the easiest part of this project.

Cheers!
Radical Brad


Top
 Profile  
Reply with quote  
PostPosted: Mon Sep 28, 2015 10:42 pm 
Offline
User avatar

Joined: Mon May 25, 2015 2:25 pm
Posts: 632
Location: Gillies, Ontario, Canada
Wow, cleaning up all of the wiring took longer than most of the design sessions I had!
Every single IO line is now connected to a single section of the board, and all wiring is cut to length or wrapped in bus bundles.
The only messy part left is the Atmel XMega, but it will soon be moving out to make room for the 6502.
It looks like there might be enough board space for the 6502 and multiplexer, but it will be a squeeze!
I am almost done drilling and sanding the plates to make the other equal sized board for the sound system as well.

Here is the state of the board as of today...

Image
The completed Video System ready for the 6502!

All of the new green wires are the IO lines, which lead to 2 rows of 20 pins on the board.
I will do the same thing on the Sound Board so that the IO lines are close to the multiplexers.

Here are the next steps to be completed...

1) Install multiplexers to make IO address like SRAM.
2) Recode the XMega test program to act like 6502 IO.
3) Make a new demo without those damn balls to test everything.
4) Make a temporary 64K boot loader for the 6502 using an AVR.
5) Install the 6502 and test the IO system.
6) Add the other mega-breadboard to make room for the boot logic.
7) Get the loader logic working with the cartridge (external serial flash).
8) Design and test the 4 channel Amiga-like sound system.
9) Write optimized 6502 libraries (Kernal) to make programming easy.

From there the choice will be either a real PCB or hand wired massive perforated board.
The final Vulcan-74 will live in a retro style cabinet with glass front to show off the internals.

... wow sounds like a lot of work for a dude with 2 free hours a week, but it will happen!

Ok, I am off to design the multiplexing IO system using state of the art tools... notepad and pencil.
So far this project has been a blast to work on, and it actually works exactly as planned.

Later, 8 bit freaks!
Radical Brad


Top
 Profile  
Reply with quote  
PostPosted: Tue Sep 29, 2015 4:19 am 
Offline
User avatar

Joined: Thu Dec 11, 2008 1:28 pm
Posts: 10791
Location: England
I hope it still works well after all these changes... there's a school of thought which says bundling wires will increase crosstalk. It certainly can be true - whether it's a problem in practice, well, I suppose we'll see!


Top
 Profile  
Reply with quote  
PostPosted: Tue Sep 29, 2015 4:40 am 
Offline
User avatar

Joined: Thu May 28, 2009 9:46 pm
Posts: 8138
Location: Midwestern USA
Oneironaut wrote:
Wow, cleaning up all of the wiring took longer than most of the design sessions I had!

It reminds of when I worked on ZMTs, c. 1970. It was all wire-wrapped and there was a lot of wire to wrap. :(

How much juice does that beast consume while up and running?

_________________
x86?  We ain't got no x86.  We don't NEED no stinking x86!


Top
 Profile  
Reply with quote  
PostPosted: Tue Sep 29, 2015 5:15 am 
Offline
User avatar

Joined: Tue Nov 16, 2010 8:00 am
Posts: 2353
Location: Gouda, The Netherlands
BigEd wrote:
I hope it still works well after all these changes... there's a school of thought which says bundling wires will increase crosstalk. It certainly can be true - whether it's a problem in practice, well, I suppose we'll see!


If you only bundle wires that change on the same clock edge, the crosstalk doesn't hurt much.


Top
 Profile  
Reply with quote  
PostPosted: Tue Sep 29, 2015 12:36 pm 
Offline
User avatar

Joined: Mon May 25, 2015 2:25 pm
Posts: 632
Location: Gillies, Ontario, Canada
Yes, it works perfectly. I move wires one at a time while the unit is powered and generating video! (visual debugging).
Cross-talk, capacitance, and propagation delay are the 3 things I consider first before adding anything to the board.
As random as it looks, there was some real planning that went into the chip placement and wiring bundles.

I never think of a gate as something with 2 inputs and an output, I think of it in terms of the complete path from one wire to the next, with ones and zeros all racing each other in an attempt to either collide at the end or show up at different times. I have also calculated a 25% safety margin for all propagation delays based on the worst case scenarios stated in the datasheets. Although I am just a weekend hardware hacker, I still like to think that my project is working due to good planning, and not just dumb luck!

As for power consumption, last time I checked, the board was only half the size, but it was only pulling 300mA or so. Next time I power up, I will check the current power usage. For power, I am using a 2A wall-wart from an old Linksys router.

The second (same size) breadboard is almost ready as well, so that will double the size of this project, making room for the audio section.
I am now studying the 65C02 timings so that I can push things to the absolute limit, minus a small safety margin.

Radical Brad

BigEd wrote:
I hope it still works well after all these changes... there's a school of thought which says bundling wires will increase crosstalk. It certainly can be true - whether it's a problem in practice, well, I suppose we'll see!


Top
 Profile  
Reply with quote  
PostPosted: Thu Oct 01, 2015 12:43 am 
Offline
User avatar

Joined: Mon May 25, 2015 2:25 pm
Posts: 632
Location: Gillies, Ontario, Canada
Having seen many 6502 tutorials and primers, I must say that this is the ONLY one you need!...

http://laughtonelectronics.com/Arcana/V ... iming.html

Just wanted to say... thanks Doc!
The visual, scale accurate timing drawings were perfect.
I feel ready to drop the 6502 onto the board on my next rainy day.

Radical Brad


Top
 Profile  
Reply with quote  
PostPosted: Thu Oct 01, 2015 5:10 pm 
Offline
User avatar

Joined: Fri Dec 11, 2009 3:50 pm
Posts: 3343
Location: Ontario, Canada
Oneironaut wrote:
Just wanted to say... thanks Doc!
You're welcome -- I'm glad you found the Visual Guide to 65xx CPU Timing worthwhile! :) To say it's the only tutorial necessary is an exaggeration (hardware timing is the only subject covered) but thanks just the same for your enthusiasm. Questions and suggestions are solicited in this thread, as folks may notice things I overlooked.


Oneironaut wrote:
[ regarding Peter's ROMulus ] Always great to see a tangle of wires generating crisp video!
The "tangle of wires" below may interest some readers. It isn't nearly as pretty as Vulcan-74 but it does generate crisp (albeit monochrome) video. Also like Vulcan, it features a heavy emphasis on 65c02 and on Retro, 1980's-vintage parts. It was built in the 80's, back when the stuff wasn't Retro!

A minimalist kludge which I adapted from Don Lancaster tricks the 'c02 into doing double duty as a DMA controller that burst-fetches video data from RAM. (The tangle of wires doesn't look minimalist because much of it is for 65xx instruction set extension. Discussion thread here.)


Attachments:
KK computer wiring side view.jpg
KK computer wiring side view.jpg [ 373.17 KiB | Viewed 1683 times ]

_________________
In 1988 my 65C02 got six new registers and 44 new full-speed instructions!
https://laughtonelectronics.com/Arcana/ ... mmary.html


Last edited by Dr Jefyll on Sat Oct 03, 2015 4:54 pm, edited 1 time in total.
Top
 Profile  
Reply with quote  
PostPosted: Sat Oct 03, 2015 2:55 pm 
Offline
User avatar

Joined: Mon May 25, 2015 2:25 pm
Posts: 632
Location: Gillies, Ontario, Canada
Multiplexing is coming along nicely, and if time permits tomorrow, I may have the 6502 connected to the board.

In order to deal with the 6502 IO requirements, all control lines from the Vulcan-74 board are single bit negative logic. For instance, to set the X-Destination location of the Sprite Processor, the 6502 will write to address 780, at which point a 74HC688 comparator will capture the high address of 768, and the 74HC139's will decode the low address to one of 256 locations (780 in this case). The data output by the 6502 will then be written to the 74HC574 as the IO line transitions from low to high on the next program counter advance by the 6502.

To deal with the 3 IO lines that are not LO-HI pulsed, a 74HC74 will be used to set or clear the bit. The OE lines from all graphics memories need this kind of control.

The goal for tomorrow will be to have the multiplexing system running under AVR control for a final test.
Assuming things are working as planned, the AVR will be removed and the 6502 will take its place.
I will be using another AVR to boot-load the 6502's program memory for a while, but only the 6502 will talk to Vulcan-74.

I had the chance to test the power requirements of the board, and it is "currently" drawing 300 milliamps.
Not bad for a board with 125 ICs running at 20 or 32 MHz!...

Image
Not even half an Amp of current draw yet!

Since the Sound System will also contain at least 100 ICs, I would guesstimate a final current draw of about an Amp.
I am using a tiny 3Amp wall wart from an old Linksys router, so it should be fine for the completed project.

Cheers,
Radical Brad


Top
 Profile  
Reply with quote  
PostPosted: Sat Oct 03, 2015 3:01 pm 
Offline

Joined: Sat Oct 03, 2015 2:55 pm
Posts: 2
Hi Oneironaut,
Congratulations for your great project!!!
Sorry for my bad english (i am french).
I will follow your adventure from now.
Have you got a website or a blog?
I will try to follow and build the same project for the french community because i always dream of building a cartridge system also.
The idea to separate the GPU from the CPU (µMCU) is also a great choice i think.
I didn't have the capabilities to design from scratch like you, but if you make some tuto or write some articles i will translate and apply them for sure.
Regards.
Neslou.


Top
 Profile  
Reply with quote  
PostPosted: Sat Oct 03, 2015 4:26 pm 
Offline
User avatar

Joined: Mon May 25, 2015 2:25 pm
Posts: 632
Location: Gillies, Ontario, Canada
Thanks, it has been a fun journey so far.

Once I get the breadboard version complete, I intend to create complete schematics and then rebuild Vulcan-74 onto either a hand wired board or real PCB, using the schematics to verify their accuracy. At that point, I am going to start a dedicated website for this project, which will include much more detailed photos, schematics, and source codes for anyone "eccentric" enough to want to build one! The website will include a forum as well a source code bank. There will also be a downloadable E-book detailing every step of the build, including theory and operation of every single IC used, and how to design a custom cabinet for the completed unit. The E-Book will probably weigh in around 600 photos, and 500 pages when completed.

I am doing this project not only for the challenge, but also because I want to use it when it is completed!
Although 7400 logic has been around for decades, every single IC used in Vulcan-74 is still available from multiple sources, so anyone could build one.
I still say there is some merit in learning how create a high speed system made with logic, especially for those wanting to work with HDL.

Ok, back to the board... I just ripped up the AVR, and am now putting down a row of 74HC138's in hopes that my IO multiplexer works!

Later,
Radical Brad


neslou wrote:
Hi Oneironaut,
Congratulations for your great project!!!
Sorry for my bad english (i am french).
I will follow your adventure from now.
Have you got a website or a blog?
I will try to follow and build the same project for the french community because i always dream of building a cartridge system also.
The idea to separate the GPU from the CPU (µMCU) is also a great choice i think.
I didn't have the capabilities to design from scratch like you, but if you make some tuto or write some articles i will translate and apply them for sure.
Regards.
Neslou.


Top
 Profile  
Reply with quote  
Display posts from previous:  Sort by  
Post new topic Reply to topic  [ 733 posts ]  Go to page Previous  1 ... 8, 9, 10, 11, 12, 13, 14 ... 49  Next

All times are UTC


Who is online

Users browsing this forum: No registered users and 3 guests


You cannot post new topics in this forum
You cannot reply to topics in this forum
You cannot edit your posts in this forum
You cannot delete your posts in this forum
You cannot post attachments in this forum

Search for:
Jump to: