studio_lowfi wrote:
I am tempted to be bloody minded about it and go down the route of using some kind of old school video chip, although I can see the appeal of using a propeller chip or something of that sort.
Nothing wrong with this! I myself will be going that direction with video, since if I'm going to be spending time mucking about with things, I'd rather be reading datasheets for and using an oscilloscope on "real" old hardware than tweaking software for a modern chip. (It probably also helps that, for my retrocomputer collection, I already have good multi-standard professional video monitor with both composite and RGB inputs.)
I have a couple of MC6847s in my parts box exactly for this, but I bought a NEC PC-6001 shortly after purchasing the chips, was immediately and forcefully reminded about how horrible the '47 looks (that green and orange!) and kind of lost motivation to use them. But I've since bought some MSX machines and found the display fairly acceptable with them, so I've ordered some TMS9928 chips which may bring my video ideas back to life. (The programming interface for them is reasonably nice, they need virtually no address space in main system RAM, and people have now figured out how to use SRAM instead of DRAM for their video memory. And it helps that I've got a friend who has actually used one in anger for
his ColecoVision clone.)
Quote:
As for making my own PCB, while I have done it in the past, it was quite a while back... I'm tempted to try some of the boards already designed for the RC6502 bus for the purpose of getting started, and eventually then maybe design my own board for the 6522 (or maybe adapt existing 6522 boards that exist for the RC2014 bus).
I'd say that starting with pre-designed boards is definitely the way to go. It gets you to the satisfaction of having something up and running a lot quicker, and also lets you study and experiment with an existing design.
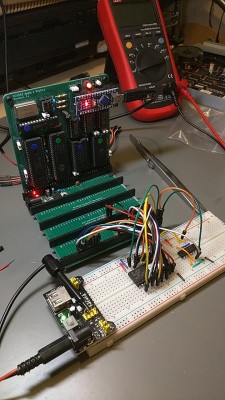
Also keep in mind that you need not use the backplane and board system for
everything just because you're using it for part of the system. I needed to examine a ROM the other day, and the fastest and easiest way was to drop it into my RC6502 system with a smidgen of decoding:
Attachment:
 IMG_20200722_214210_321.jpg [ 196.18 KiB | Viewed 1586 times ]
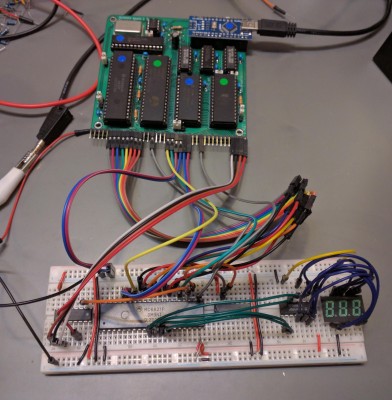
For simple expansion there's not even any need for a backplane board; you can just attach directly to the bus pins on your SBC. Here's a second 6821 PIA attached to my RC6502 SBC, along with a hex display on a few pins of one of its output ports:
Attachment:
 IMG_20200205_204925.jpg [ 867.32 KiB | Viewed 1586 times ]
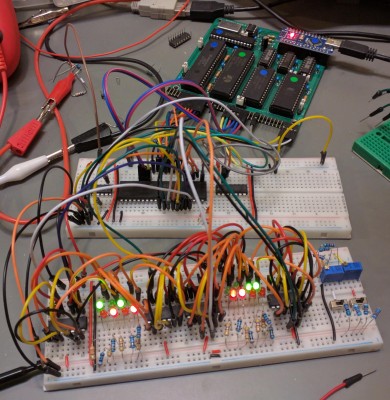
I actually used that configuration to develop and test my octal logic probe, seen here on another breadboard below it:
Attachment:
 IMG_20200214_155416.jpg [ 916.71 KiB | Viewed 1586 times ]
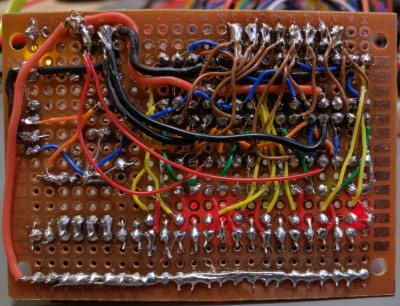
When you do get to doing boards, if you're impatient or just find hours in a CAD program to be tedious, you also have a couple of other options for techniques. Traditional hand-wired protoboard has worked well enough for me, though I discovered the hard way that making it very compact can drastically increase the difficulty of soldering it. (The example below is the bottom side of the octal logic probe prototyped on breadboard above.) One hint to make things easier: use 30 AWG wire-wrap wire, not the more common 24 AWG wire used in breadboards.
Attachment:
 IMG_20200305_183022.jpg [ 1.73 MiB | Viewed 1586 times ]
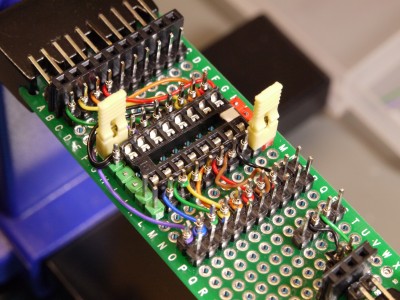
Wire wrap is a great technique, and very easy to learn: I was pretty easily getting decent WW connections within a couple of hours of starting out, with no help from anyone; soldering took much longer and I had lots of help. While the tool and wire are dirt cheap, the expensive sockets did put me off, though, but I discovered a
trick from JuanGg in this forum of combining protoboard and wire wrap. Basically, you solder standard pin headers adjacent to standard sockets (done pretty easily by dropping a little cutting of component lead between the socket and header pin on the solder side of the board), solder power and ground leads too if you like, and then flip the board over and wire-wrap between the header pins. This not only gives pretty much instant gratification, but also makes it easy to make changes. (So, e.g., rewiring a socket to replace a 27128 EPROM with a 28128 EEPROM should be a few minutes work.)
You can see some examples of this used for a pretty large project in the thread I've linked above, but here's a close-up of a small test example I made, both powering a small chip and bringing its pins out to nearby straight and right-angle headers. Here I was experimenting with bringing power up on headers on the side and using jumpers to bring power and ground to the standard pins for a 74xxx part. If the power/ground pins were not right at the end, I could substitute short wires with crimped female dupont header at each end for the side-by-side jumpers you see there.
Attachment:
 P1010098.JPG [ 5.93 MiB | Viewed 1586 times ]
Quote:
I think I will begin out using the RC6502 bus with some kind of backplane in that I'm used to the 6502 and its connections, but know very little about the Z80. That being said, I can see myself trying to maybe begin reverse engineering some of the more useful RC2014 modules to try to adapt them to the RC6502 bus. I would definitely like to play with some vintage sound chips.
What a co-incidence! I was just the other day prompted (again by my friend's ColecoVision clone) to order some GI AY-3-8910A chips from AliExpress, which should drop into my RC6502 system with almost no work. I'm thinking it wouldn't be too hard to put together a board with four of these, for some beautiful 12-voice symphonies. (And 64 channels of digital I/O! More than a third of the pins on the 8910 are devoted to a pair of 8-bit parallel ports, which I guess could be handy for things like controlling bank switching.)


