Not really a 6502 specific topic but I wanted to document this somewhere as doing development on Windows using GitHub can be a bit of a fraught process initially.
Download and install
Putty (if you don't have it already). This will install puttygen.exe
Run
puttygen, it should be available from the Windows Start Menu after installation.
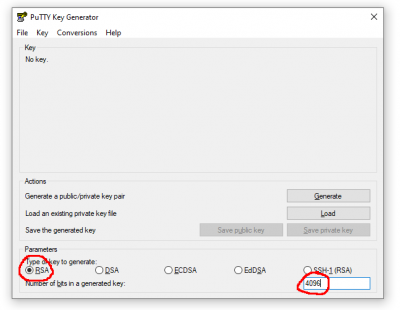
GitHub recommend using an
ed25519 type key but Putty doesn't seem to support that. Secondarily they recommend an
RSA 4096 type key and that can be generated by Putty.
Attachment:
 PuttyGen-RSA-4096.png [ 26.55 KiB | Viewed 14082 times ]
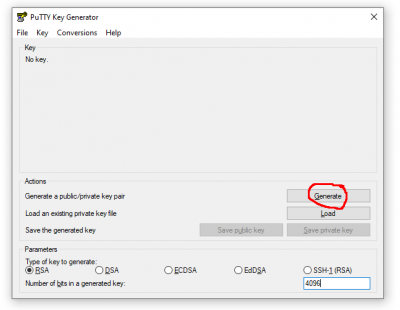
Click
GenerateAttachment:
 PuttyGen-Generate.png [ 26.26 KiB | Viewed 14082 times ]
and wave your mouse around until the green bar is satisfied.
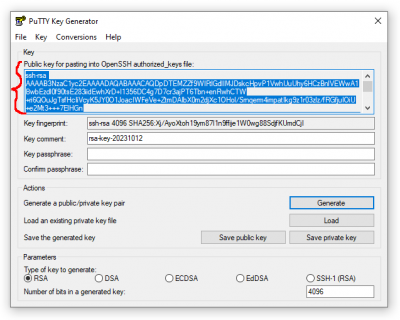
Once the key is generated
copy the
Public-key text...
Attachment:
 PuttyGen-Copy-public-key.png [ 36.56 KiB | Viewed 14082 times ]
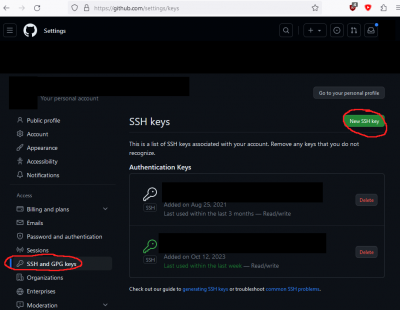
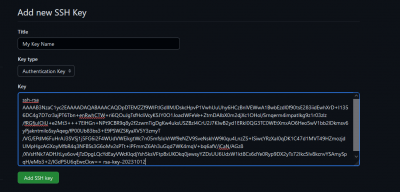
...into a new GitHub SSH Key. This can be found under your Account Settings, SSH and GPG keys:
Attachment:
 Github-New-ssh-key.png [ 57.03 KiB | Viewed 14082 times ]
And paste the Public-Key text into your new GitHub SSH Key
Attachment:
 Github-Paste-key.png [ 49.71 KiB | Viewed 14082 times ]
Add SSH Key and we're done on the GitHub side of things.
Back in
puttygen copy the Public-Key text again, paste it into a text editor and save it somewhere useful with the .pub extension. E.g. C:\MyKeys\
MyKeyName.pub Do not use the Save Public Key button from puttygen unless you know what you're doing. We're saving the OpenSSH Public-Key text just-in-case.
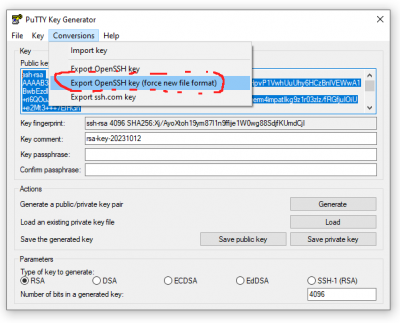
Next export the Private-Key for OpenSSH, again this is just-in-case...
Attachment:
 PuttyGen-Export-private-key.png [ 35.87 KiB | Viewed 14082 times ]
...and save it somewhere secure. E.g. C:\MyKeys\
MyKeyName Note the lack of extension.
The saved Private-Key should look something like this:
Code:
-----BEGIN OPENSSH PRIVATE KEY-----
b3BlbnNzaC1rZXktdjEAAAAABG5vbmUAAAAEbm9uZQAAAAAAAAABAAACFwAAAA
...
BAUGBwgJ
-----END OPENSSH PRIVATE KEY-----
...but with a lot more gumph in it. If things go terribly wrong the OpenSSH private key can always be re-imported back into puttygen.
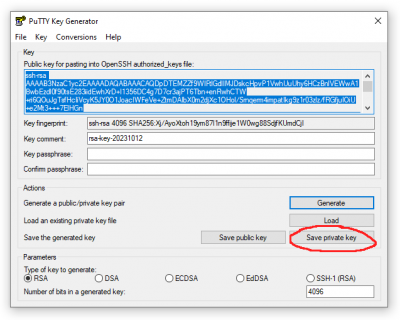
Finally we need to Save the Private-Key in a form that can be used by Putty's authentication agent
Pageant.
Attachment:
 PuttyGen-Save-private-key.png [ 36.71 KiB | Viewed 14082 times ]
Save it somewhere secure E.g. C:\MyKeys\
MyKeyName.ppk and note the ppk extension.
The PPK should look something like:
Code:
PuTTY-User-Key-File-3: ssh-rsa
Encryption: none
Comment: rsa-key-20231012
Public-Lines: 12
AAAAB3NzaC1yc2EAAAADAQABAAACAQDpDTEMZZf9WIFtlGdlIMJDskcHpvP1
...
WnUQlA==
Private-MAC: bbac19a0c60363e1ced7f7c72c340709991381d4706e3e6ee345e1cc24540850
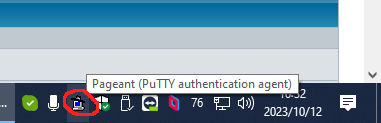
Finally open
Pageant from the task bar by double clicking its icon (it should have started running when Putty was installed).
Attachment:
 Pageant-Taskbar.png [ 14.92 KiB | Viewed 14082 times ]
And add your newly saved PPK.
Attachment:
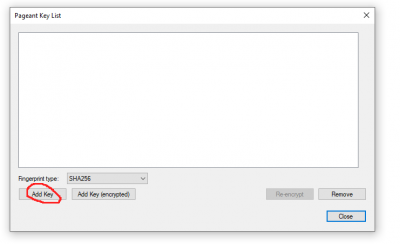 Pageant-Add-key.png [ 14.32 KiB | Viewed 14082 times ]
If everything has gone correctly you should see your new PPK in Pageant:
Attachment:
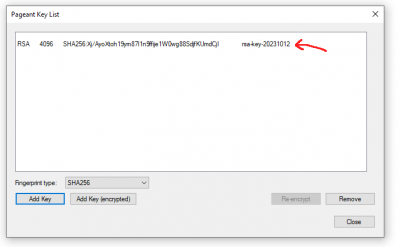 Pageant-done.png [ 16.28 KiB | Viewed 14082 times ]
And you can now talk to GitHub using Putty via SSH!


